|
This week I made a flashlight using an arduino, LED, joystick, and water bottle. First I drew a schematic. (Bare with me as I try to remember how to draw one) 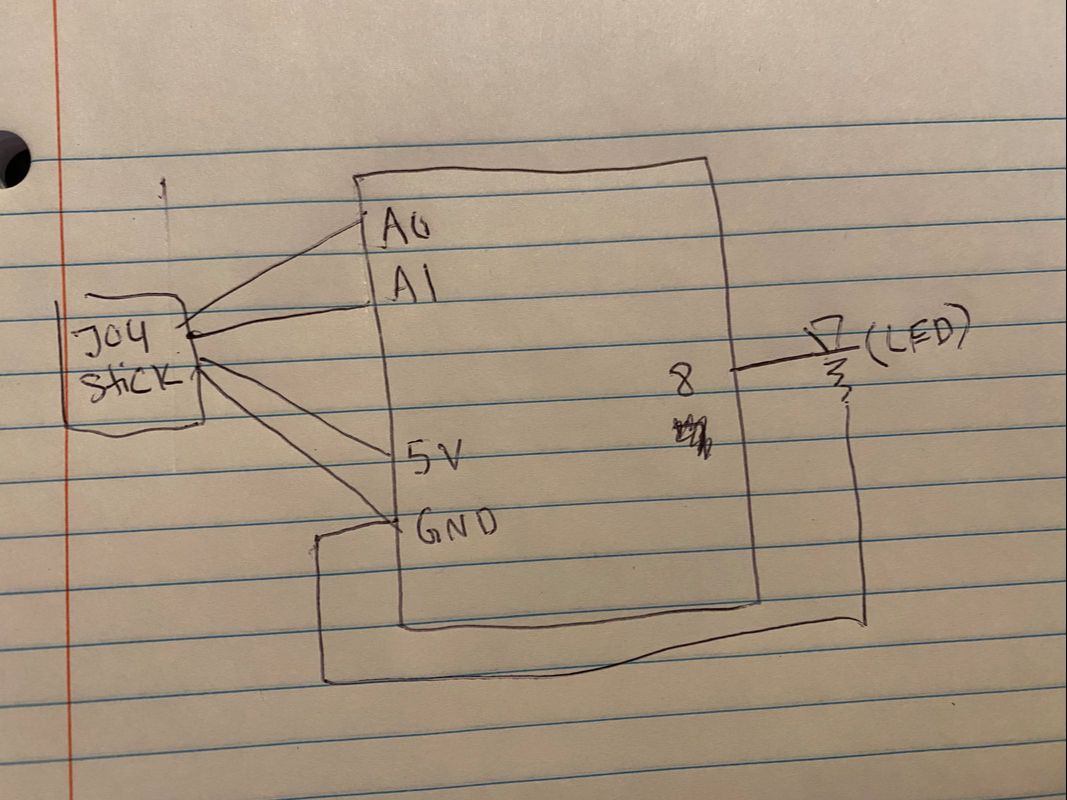 Then I tried to get one LED to light up. 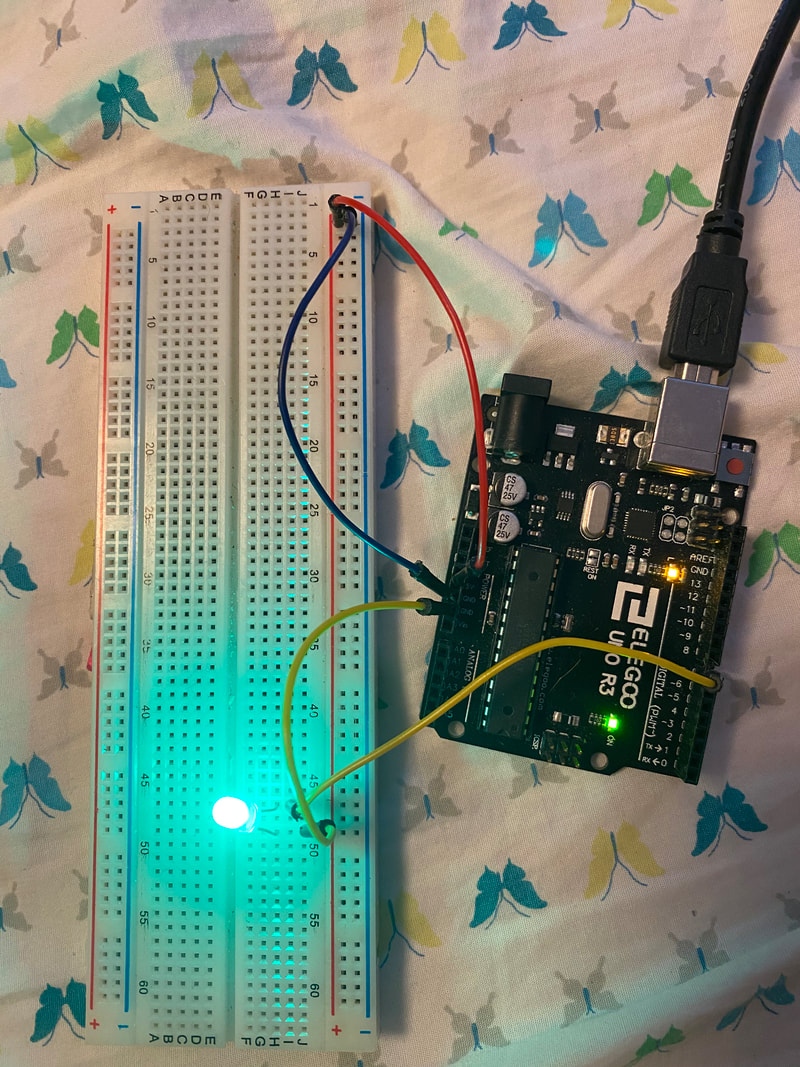 I then added the joystick. The joystick controls on and off based on if it is left (off) or right (on) on the x axis. I then added the top of a disposable water bottle around the LED to mimic the appearance of a flashlight. 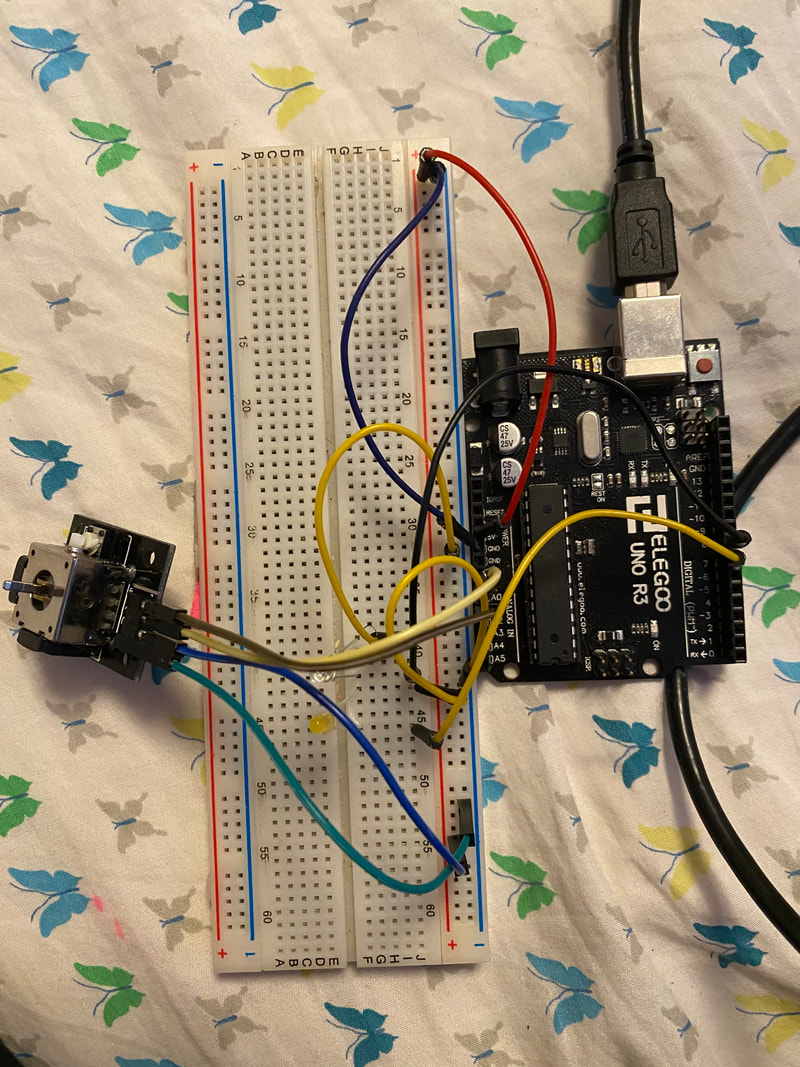 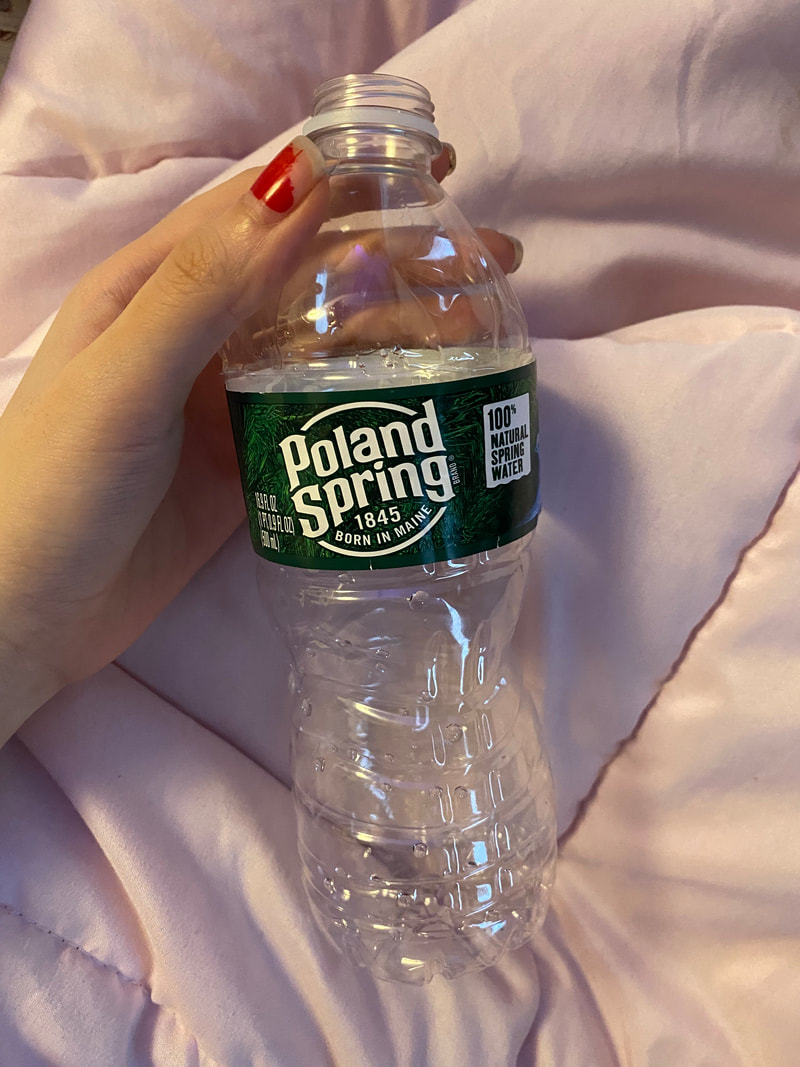 Here is the final flashlight! I wrote my code by modifying an existing code I found on the arduino website. (Link below under "Sources Used." Code: int ledPin = 8; int joyPin1 = 0; // slider variable connecetd to analog pin 0 int joyPin2 = 1; // slider variable connecetd to analog pin 1 int value1 = 0; // variable to read the value from the analog pin 0 int value2 = 0; // variable to read the value from the analog pin 1 void setup() { pinMode(ledPin, OUTPUT); // initializes digital pins 0 to 7 as outputs Serial.begin(9600); } int treatValue(int data) { return (data/10); } void loop() { // reads the value of the variable resistor value1 = analogRead(joyPin1); // this small pause is needed between reading // analog pins, otherwise we get the same value twice delay(100); // reads the value of the variable resistor value2 = analogRead(joyPin2); if(treatValue(value2)>75){ digitalWrite(ledPin, HIGH); }else if(treatValue(value2)<25){ //delay(value1); digitalWrite(ledPin, LOW); } // delay(value2); //Serial.print('J'); Serial.print(treatValue(value1)); Serial.println(treatValue(value2)); } Sources Used:
www.arduino.cc/en/Tutorial/JoyStick
1 Comment
2/3/2020 01:13:27 pm
Nice work. I like that you drew a wire diagram first. How did you cut the water bottle? How is the water bottle attached to the LED? Leave a Reply. |
AuthorWrite something about yourself. No need to be fancy, just an overview. Archives
March 2020
Categories |
 RSS Feed
