|
This week, I decided to make a cardboard Arduino enclosure that fits an ultrasonic sensor and LED. Materials: 4x 1 inch screws 4x bolts (to fit 1 inch screws) 4x 1.5 inch spacers cardboard ultraconic sensor LED First I used scissors to make 2 holes for the ultrasonic sensor to fit. To widen the hole I opened the scissors more and more until my desired size was achieved. I then did the same for the LED. 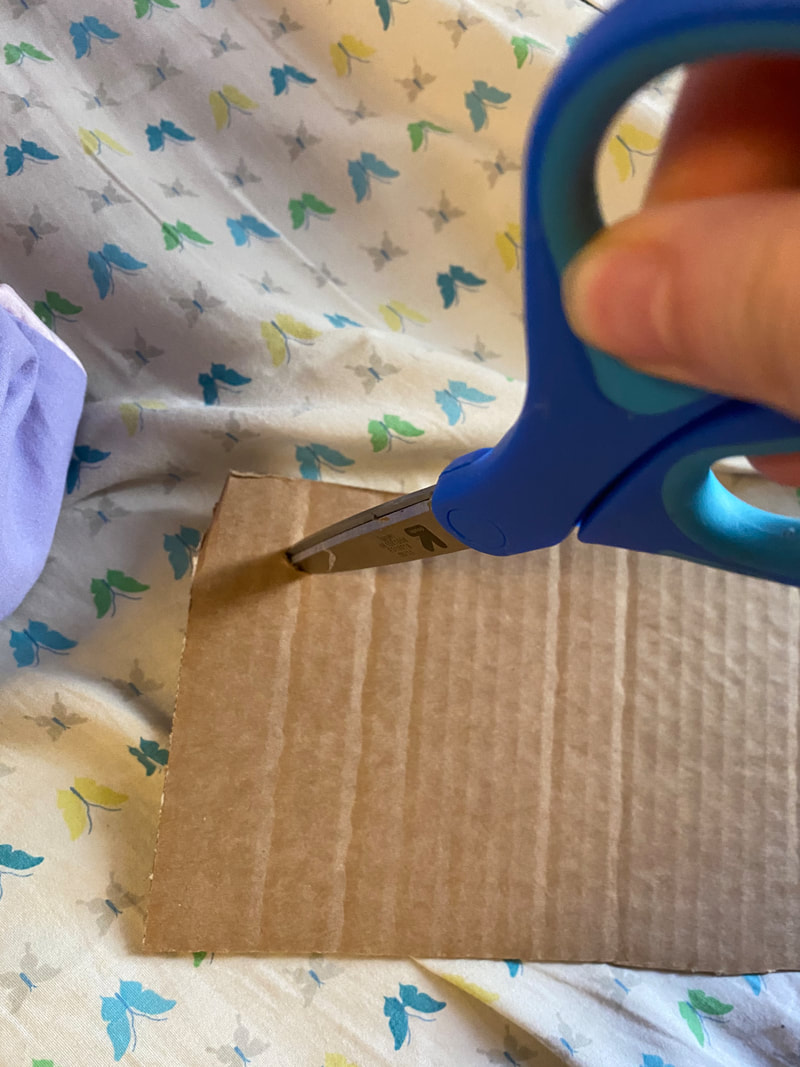 Then I used the scissors to make 4 pilot holes for the screws to go into. 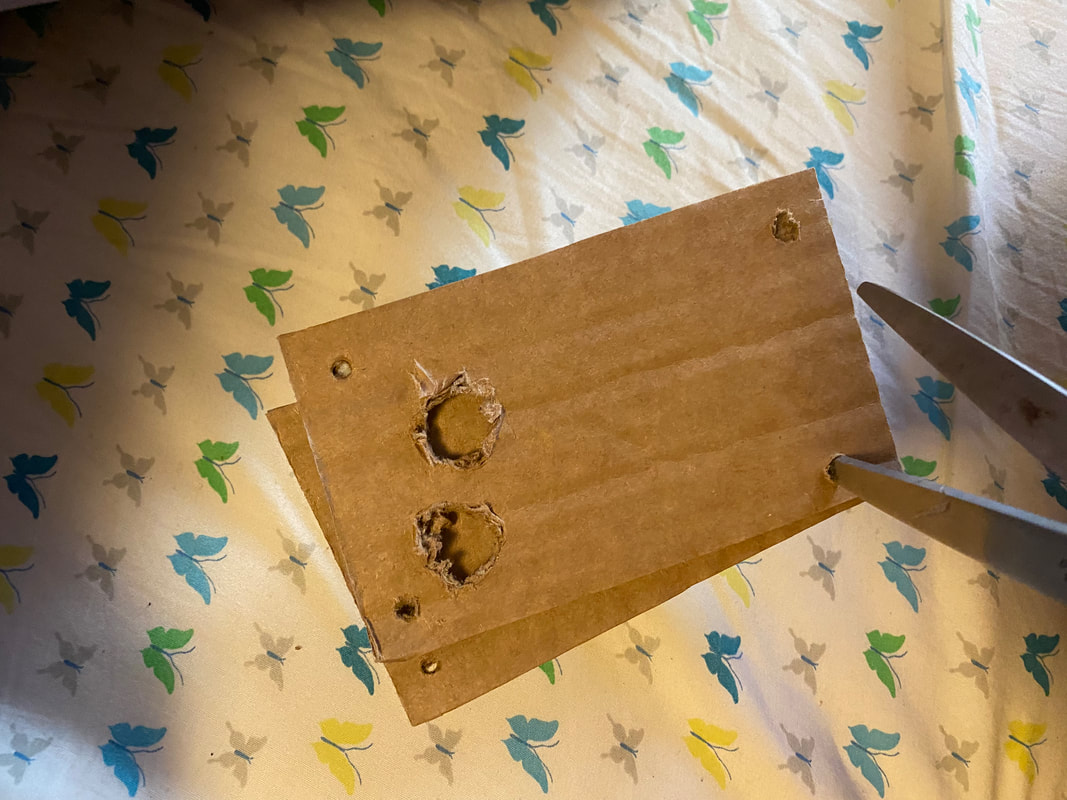 When the pilot holes were made, I placed each of the 4 screws in. I then placed one 1 inch spacer on each screw. Next, I placed the bottom piece of the enclosure on and sealed the pieces together with a bolt on the bottom of each of the four screws. 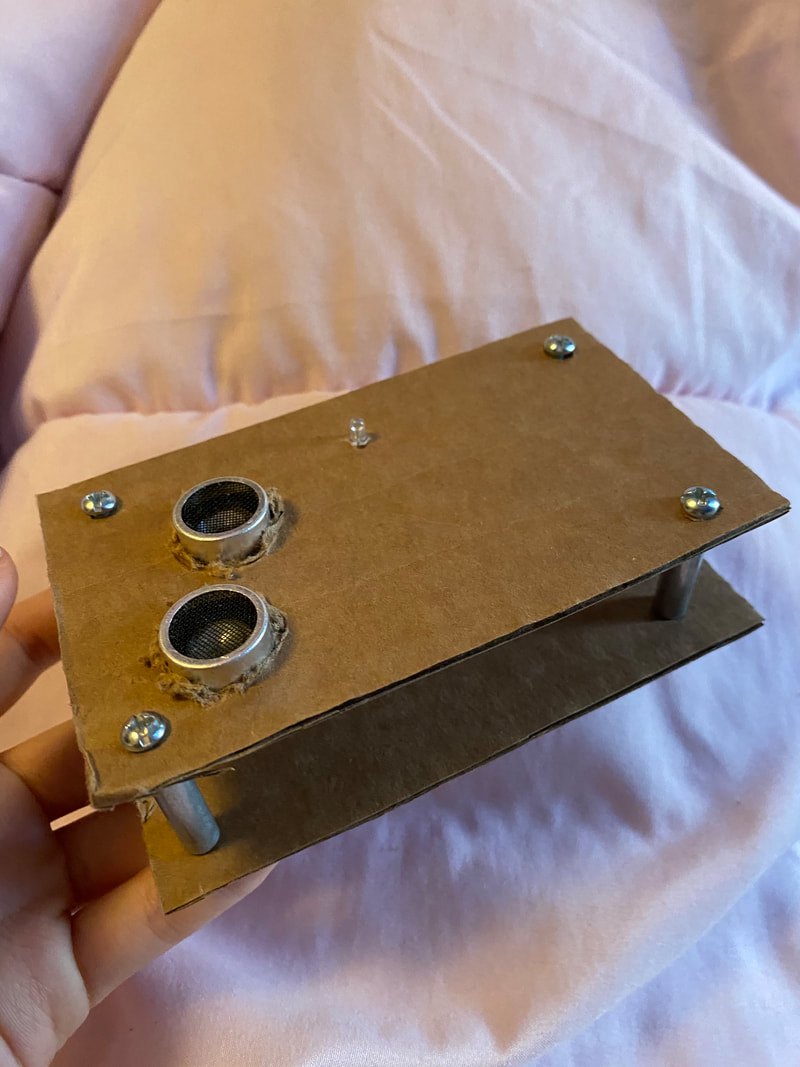 (I forgot to put the LED in the picture below) 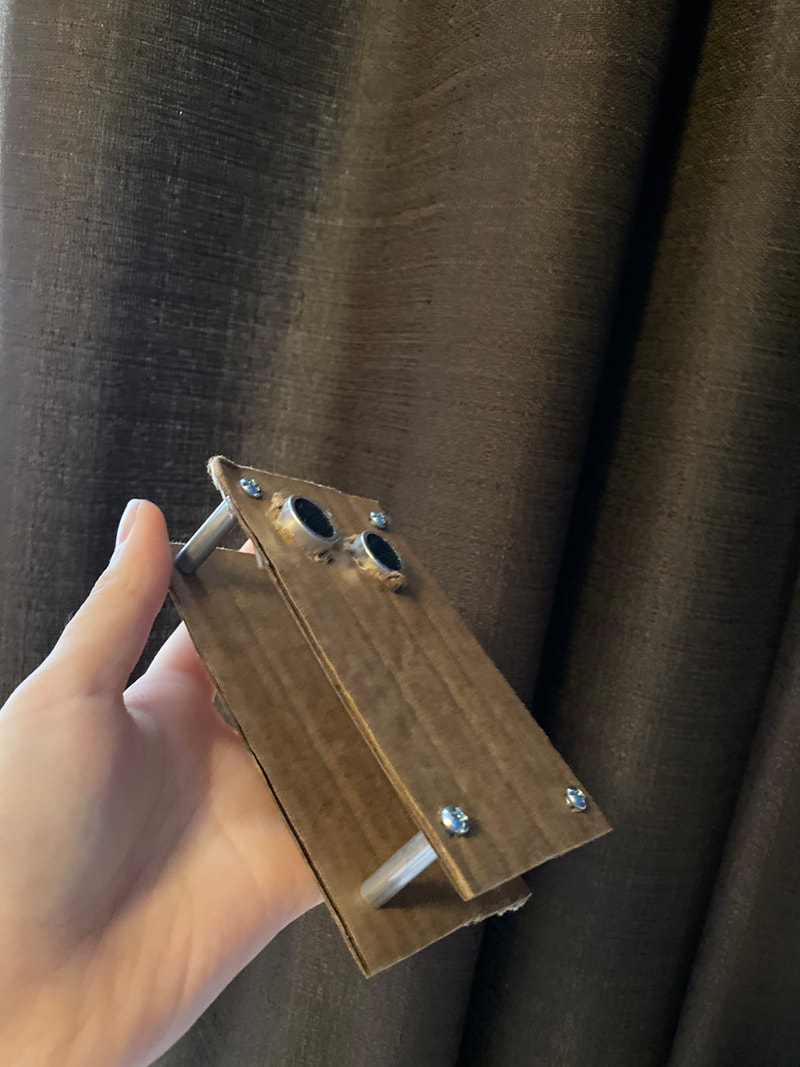 Sadly, I had lost one of my spacers and had to improvise. Instead of having a fourth spacer, I used 2 bolts to secure the last screw. 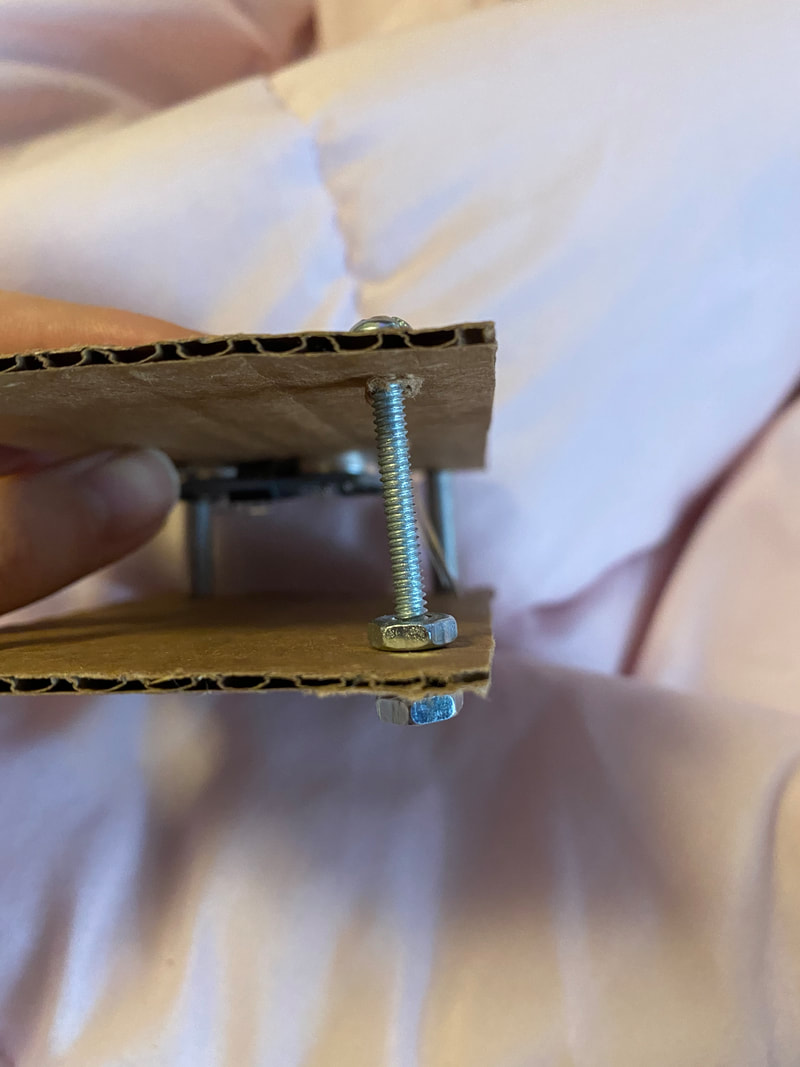
0 Comments
Leave a Reply. |
AuthorWrite something about yourself. No need to be fancy, just an overview. Archives
March 2020
Categories |
 RSS Feed
